How to Create a Digital Menu for Your Restaurant (Step-by-Step)
Creating a digital menu for your restaurant doesn't need to be complicated. Whether you're replacing printed menus entirely or adding a QR code option alongside them, the process is straightforward once you know the steps.
This guide walks you through how to create a digital menu for your restaurant — from organising your content to generating QR codes and going live. No point of sale system required, no app for your diners to download.
Why Go Digital?
Three practical reasons drive the shift to digital restaurant menus.
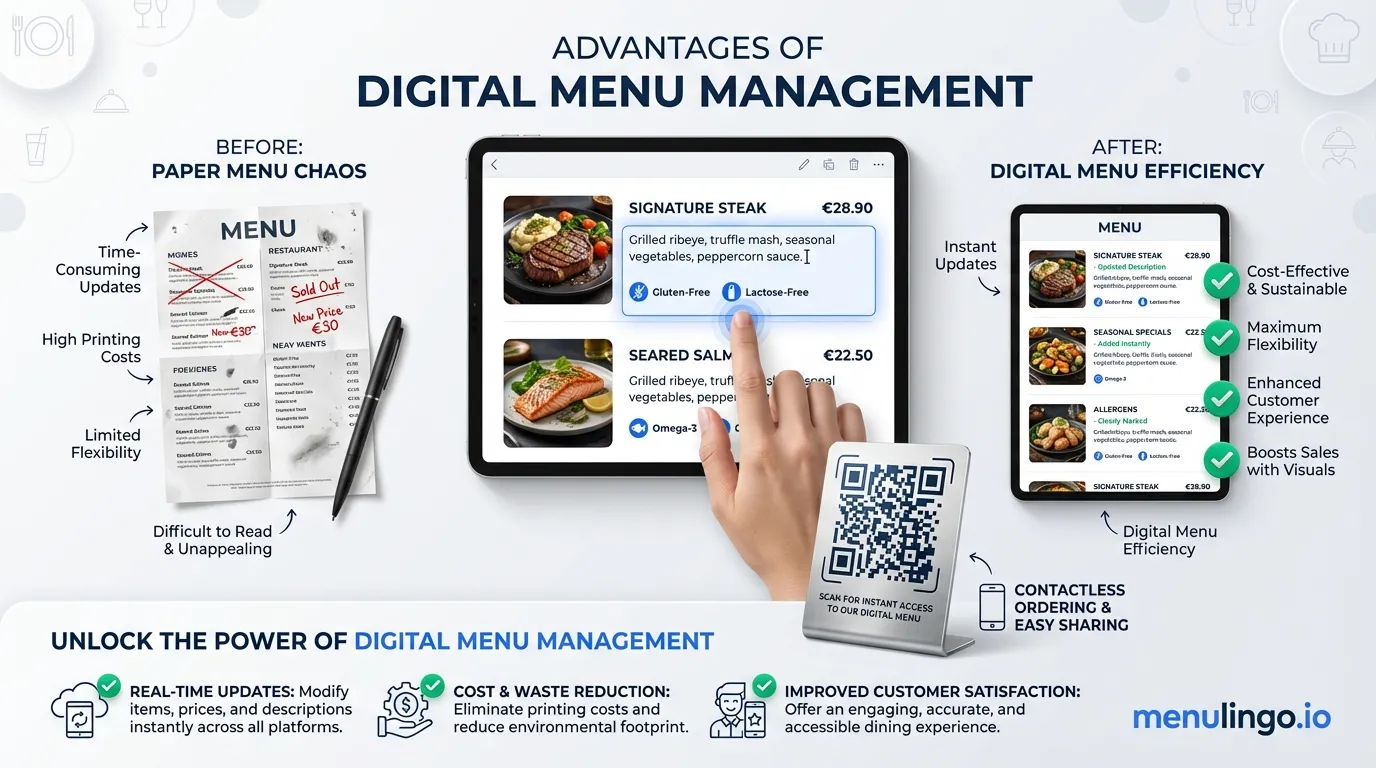
Cost savings on reprints. Every time you change a dish, adjust pricing, or run a seasonal special, printed menus need reprinting. A restaurant with 30 tables updating menus quarterly can spend $800–2,000 per year on printing alone. With a digital menu, changes are instant and free.
Allergen compliance. Allergen disclosure regulations are tightening worldwide. The EU requires written allergen information for 14 allergens. The UK's updated FSA guidance now recommends written allergen disclosure for all food businesses. California's new law takes effect in July 2026. A digital menu with built-in allergen detection makes compliance significantly easier than managing printed allergen charts.
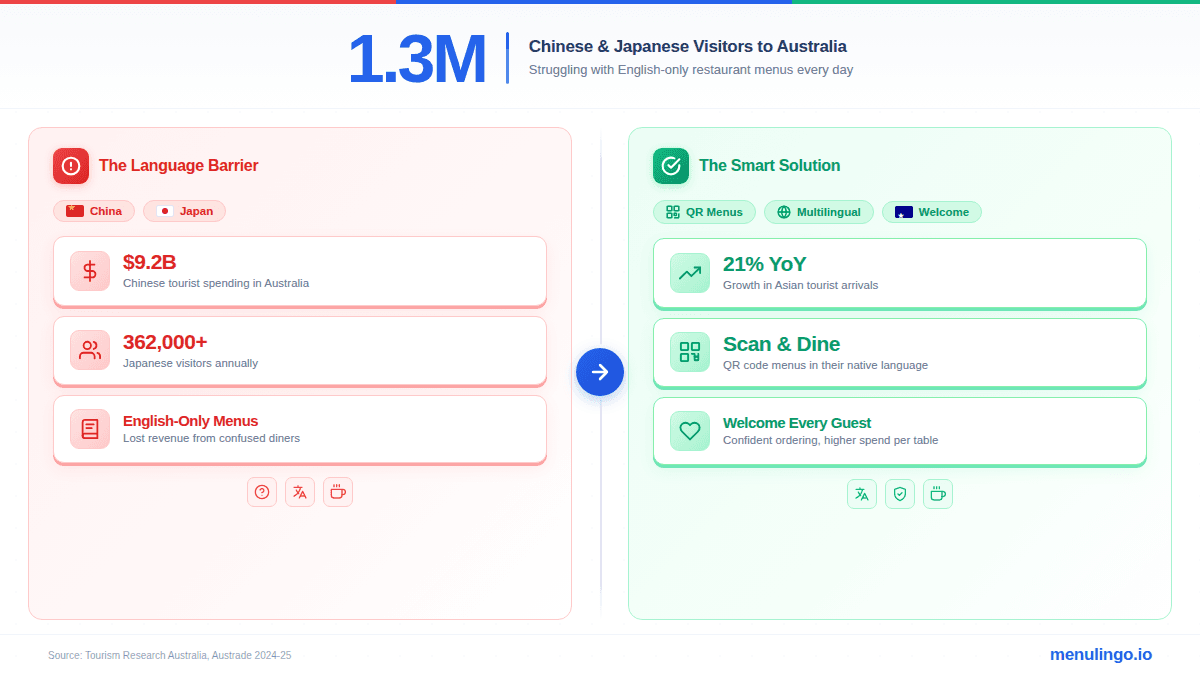
Multilingual access. If your restaurant serves international tourists or operates in a multicultural area, a digital menu can display in multiple languages from a single QR code. No separate printed menus for each language, no awkward pointing at dishes. Read more about how AI menu translation works to understand the technology behind accurate restaurant translations.
Choosing the Right Digital Menu Platform
Not all digital menu solutions are equal. Here are the three main approaches, with honest tradeoffs.
Option 1: PDF Menu on Your Website
Upload a PDF of your existing printed menu to your website and link a QR code to it.
Pros: Free, fast to set up. Cons: Terrible mobile experience (pinch-to-zoom on a phone is frustrating), no allergen filtering, no multilingual support, no analytics, and you still need to create new PDFs every time the menu changes. PDFs also load slowly on mobile connections and aren't accessible to screen readers.
Option 2: Third-Party Ordering Platform
Platforms like Square, Toast, or UberEats offer digital menus — but they're designed around ordering and payment, not menu presentation.
Pros: Integrated with POS, supports online ordering. Cons: Typically requires diners to create an account or download an app, tied to a specific POS system, limited allergen information, minimal or no multilingual support, and often charges transaction fees. If you just want a menu that diners can browse and read, these platforms add unnecessary friction.
Option 3: Purpose-Built Digital Menu Platform
Platforms specifically designed for digital menu creation — like MenuLingo's digital menu builder — focus on the menu experience itself. No POS integration required, no diner registration, no app download.
Pros: Mobile-optimised design, built-in allergen management, multilingual translation, QR code generation, instant updates, analytics. Cons: Monthly subscription cost (though typically less than quarterly reprint costs).
The best digital menu platform for your restaurant depends on what you need. If you want online ordering, an ordering platform makes sense. If you want a beautiful, accessible, multilingual menu with allergen compliance, a purpose-built solution is the better fit.
Step 1: Organise Your Menu Content
Before touching any platform, get your menu organised. This step saves the most time.
Categories first. Group your dishes into clear categories: Starters, Mains, Desserts, Drinks, Sides. Use whatever structure your diners expect. If you have a kids' menu or a separate lunch menu, make those distinct categories.
Standardise your descriptions. Write a one to two sentence description for each dish. Include the key ingredients — this matters for allergen detection later. "Pan-seared salmon with roasted vegetables" is better than "Chef's salmon" because it gives diners (and allergen systems) the information they need.
Confirm pricing. Make sure every item has a current price. If you have variations (small/large, single/double), list each with its price. Getting this right now means fewer corrections later.
Gather images (optional but recommended). Dish photos increase engagement. They don't need to be professionally shot — well-lit phone photos work — but they should accurately represent what diners will receive. If you don't have photos yet, most platforms work fine without them.
Step 2: Upload or Enter Your Menu Items
How you get your menu into the platform depends on the platform you've chosen.
Manual entry. Most platforms offer a form-based editor where you type each dish name, description, price, and category. This is the most accurate method, but time-consuming for large menus.
Menu import from image or PDF. Some platforms use AI to parse an existing menu image or PDF, extracting dish names, descriptions, and prices automatically. This cuts setup time significantly for restaurants with extensive menus. You'll still want to review the output for accuracy — especially for dishes with unusual names or complex descriptions.
Spreadsheet upload. If you already have your menu in a spreadsheet, some platforms accept CSV imports. This is efficient for restaurants with many items.
Whichever method you use, review every item before moving to the next step. Typos in dish names and wrong prices are the most common issues, and they're much easier to fix now than after you've generated QR codes and gone live.
Step 3: Set Up Allergen Information
This is where digital menus deliver their biggest advantage over printed alternatives.
For each menu item, you need to identify which allergens are present. The 16 major food allergens recognised across major jurisdictions include milk, eggs, fish, crustaceans, tree nuts, peanuts, wheat/gluten, soybeans, sesame, celery, mustard, lupin, molluscs, and sulphites — though which ones you need to declare depends on your country's regulations.
Manual allergen tagging means going through each dish and ticking which allergens apply. This works, but it's slow and error-prone — especially for dishes with complex sauces or shared cooking equipment.
AI allergen detection analyses your menu item descriptions and ingredient lists, then flags potential allergens with confidence scores. This catches allergens that manual review often misses — like soy in Worcestershire sauce or milk proteins in some bread recipes. You still confirm every flagged allergen before it goes live to diners, but the AI does the heavy lifting.
Whatever approach you use, take allergen information seriously. Check our digital menu compliance checklist to make sure you're covering the requirements for your jurisdiction. Getting allergens wrong isn't just a compliance issue — it's a safety issue.
Step 4: Add Translations
If your restaurant serves any international diners, multilingual support transforms the dining experience. A Chinese tourist scanning your QR code sees the menu in Mandarin. A French couple sees it in French. Same QR code, same menu, different language — automatically.
The key question is translation quality. Generic machine translation (Google Translate, for example) struggles with restaurant menus because food terminology is culturally specific. "Capsicum" in Australian English becomes "bell pepper" in American English. Japanese dish names need cultural context, not literal translation. AI menu translation designed specifically for restaurant content handles these nuances far better than general-purpose translation tools.
When setting up translations:
- Choose your languages based on your customer base. Check your diner demographics. If 15% of your guests are from China and 10% from Japan, Mandarin and Japanese should be your priority languages.
- Review translations if you can. If you or a staff member speak the target language, spot-check the translations. Focus on signature dishes and any items with unusual ingredients.
- Don't forget English variants. If you're an Australian restaurant with American tourists, even English-to-English localisation matters — "prawns" vs "shrimp", "rocket" vs "arugula", "capsicum" vs "bell pepper."
Step 5: Generate QR Codes
With your menu content, allergens, and translations in place, it's time to create the QR codes that connect the physical restaurant to the digital menu.
A few things to get right here.
Use a redirect layer. The best QR code menu systems use a short redirect URL (like /q/abc123) that points to your actual menu page. If the menu URL ever changes, you update the redirect — the printed QR code stays valid forever. This is critical for QR code menus that are printed on permanent materials like table inserts, wall signage, or window stickers.
Design for visibility. QR codes should be large enough to scan easily — at least 3cm x 3cm. Include a brief text prompt like "Scan for menu" so diners know what the code does. Print on non-reflective material to avoid glare issues under restaurant lighting.
Consider placement. Table tents and table inserts are the most common placement. But also consider the entrance (for diners waiting to be seated), the window (for passers-by checking the menu), and takeaway packaging.
Test before printing. Scan every QR code with at least two different phones (iPhone and Android) before sending anything to the printer. Check that the menu loads quickly, displays correctly, and that language switching and allergen filtering work on both devices.
Step 6: Test and Launch
Before going live, run through this checklist.
Content accuracy. Read every dish name, description, and price on the digital menu. Compare against your current printed menu or kitchen records. Catch errors now, not after a diner orders the wrong thing.
Allergen verification. Confirm allergen information for every item with your head chef. Pay special attention to sauces, dressings, and garnishes — these are where hidden allergens lurk.
Mobile experience. Open the menu on a phone. Is it easy to read without zooming? Do categories scroll smoothly? Can you tap to expand dish details? Does the allergen filter work? Test on both iPhone and Android.
Translation spot-check. If you've added translations, ask a native speaker to review a few items in each language. Focus on your signature dishes — these are the ones diners will notice if the translation is off.
QR code scanning. Scan every printed QR code from the distance and angle a seated diner would use. Try in both bright and dim lighting conditions.
Load time. The menu should load in under 3 seconds on a mobile connection. Slow-loading menus frustrate diners and increase the chance they'll put their phone away and ask for a printed menu instead.
Once everything checks out, you're ready to launch. Most restaurants introduce QR menus alongside existing printed menus, letting diners choose their preferred format. Over time, as staff direct diners to the QR option and diners experience the benefits (allergen filtering, language switching, photos), digital usage naturally increases.
Common Mistakes to Avoid
Not updating the digital menu when dishes change. The whole point of a digital menu is that it updates instantly. If you add a new dish or remove a seasonal item, update the digital menu the same day. A stale menu undermines diner trust.
Skipping allergen review. AI allergen detection is powerful, but it's a starting point — not a replacement for human confirmation. Always have your chef or kitchen manager verify allergen flags before publishing.
Too many languages without verification. Adding 10 languages sounds impressive, but if 8 of them are never used and you can't verify their accuracy, you're creating risk without value. Start with the 2–3 languages your diners actually need, verify quality, then expand.
Placing QR codes where phones can't reach. A QR code on a high shelf or behind glass creates a bad first impression. Place codes within arm's reach at seated eye level.
Ignoring analytics. Your QR code menu generates data — scan counts, language preferences, most-viewed dishes, allergen filter usage. Use this data to improve your menu design, staffing, and marketing. A printed menu gives you none of this insight.
Get Started
Creating a digital menu for your restaurant is a one-afternoon project, not a multi-week initiative. Organise your menu, upload it to a platform, set up allergens and translations, generate QR codes, test, and launch.
If you're looking for a restaurant digital menu app that handles allergen compliance, multilingual translation, and QR code generation without requiring a POS system or diner app downloads, MenuLingo is built specifically for this. See pricing plans or start your free trial to have your digital menu live today.
Ready to make your menu multilingual?
Join restaurants already serving diners in 9 languages with accurate allergen information. 14-day free trial, no credit card required.
Start Your Free Trial